
How to Measure Timber Moisture Content: DIY Methods & Tools for NZ Projects

The Problem With "It Looks Dry Enough"
Timber that looks dry can still be far too wet to use. That's the honest truth most guides won't tell you upfront. You can run your hand over a board, tap it, even smell it, and still have no real idea what's happening inside the fibres. Moisture hides. It sits deep in the core of a plank long after the surface feels bone dry, and it's this hidden moisture that causes the warping, cupping, cracking and fungal staining that ruin so many home projects across Tasman and the wider Nelson region.
The good news? You don't need a laboratory or a trades qualification to check this properly. You need the right tool, five minutes, and a basic understanding of what the numbers mean.
How to Test Timber Moisture Content Before Your Next DIY Project
Buy or borrow a moisture meter. Pin-type meters (around $40–$150) give the most reliable readings for DIY use; pinless meters are quicker but slightly less precise on rough-sawn timber.
Aim for 12–16% moisture content for most internal furniture and joinery projects in NZ, and closer to 16–19% for outdoor structural framing, depending on end use.
Test in three spots, not one — the ends, the middle, and a few centimetres in from the surface — because moisture is rarely even throughout a board.
No meter? The oven-dry weight test is a free, surprisingly accurate backup method using kitchen scales.
Always let timber acclimatise to your local environment for at least a week or two before building with it.
Key Takeaways
Timber moisture content is the percentage of water inside the wood compared to its fully dry weight.
A pin-type meter is the best all-round DIY tool; pinless meters suit finished surfaces.
No meter? The oven-dry weight test is a free, accurate backup.
Target 10–14% for indoor furniture, 16–19% for structural framing, and 15–19% for outdoor builds.
Always test multiple spots on a board, and let timber acclimatise before building.
Checking moisture content is far cheaper than fixing warped or split timber later.
What Is Timber Moisture Content, Anyway?
Timber moisture content (MC) is simply the weight of water inside a piece of wood, expressed as a percentage of the wood's completely dry weight. Every tree is mostly water when it's freshly milled — green timber can sit at 50% MC or higher. As it dries, either naturally in the open air or in a kiln, that water gradually leaves the timber until it reaches "equilibrium," a point where it matches the humidity of the surrounding air.
This matters enormously for anyone building with timber, because wood keeps shrinking and swelling as its moisture content changes, even after it's been installed. A board that's too wet when you build with it will keep drying out afterwards, and as it does, it twists, gaps appear in your decking, and joints in furniture loosen. Understanding and checking moisture content before you cut a single piece is one of the simplest ways to protect the time and money you're putting into a project.
Why Guessing Costs You More Than a Moisture Meter Ever Will
Here's the part most people learn the hard way. A DIYer buys timber, builds a garden bench or a set of shelves, and within a few months the wood has bowed, split at the ends, or developed dark staining. The cause, nine times out of ten, is timber that was installed too wet. The repair — or worse, the full rebuild — costs far more than the $60–$100 a decent moisture meter would have cost in the first place.
This is exactly why Plankville sells dry, properly seasoned timber slabs rather than green-cut stock, and why our guide on buying dry timber slabs is one of the most-read posts on our site. But even with well-seasoned timber, checking moisture content yourself before you build gives you certainty, not just trust. It takes the guesswork out of a project you've likely invested real time and money into.
Best DIY Methods to Measure Timber Moisture Content
1. Pin-Type Moisture Meters
Pin-type meters are the most popular choice for home workshops, and for good reason. You press two small metal pins into the timber's surface, and the meter reads the electrical resistance between them — wetter wood conducts electricity more easily, so a lower resistance means a higher moisture reading. These meters are affordable, accurate to within about 1%, and work well on rough-sawn slabs, framing timber and reclaimed wood alike. The small downside is that the pins leave tiny marks, so on a finished furniture piece, test on the underside or an offcut first.
2. Pinless (Capacitance) Moisture Meters
Pinless meters use electromagnetic sensors instead of pins, so you simply hold the flat pad against the timber's surface and get a reading with zero marks left behind. They're brilliant for finished furniture, flooring and anything with a visible face. They read a shallower depth of the timber than pin meters do, so for thick slabs like the ones used in our Himalayan cedar or elm flitch projects, it's worth taking readings from both faces to get a fuller picture.
3. The Oven-Dry Weight Test (No Meter Needed)
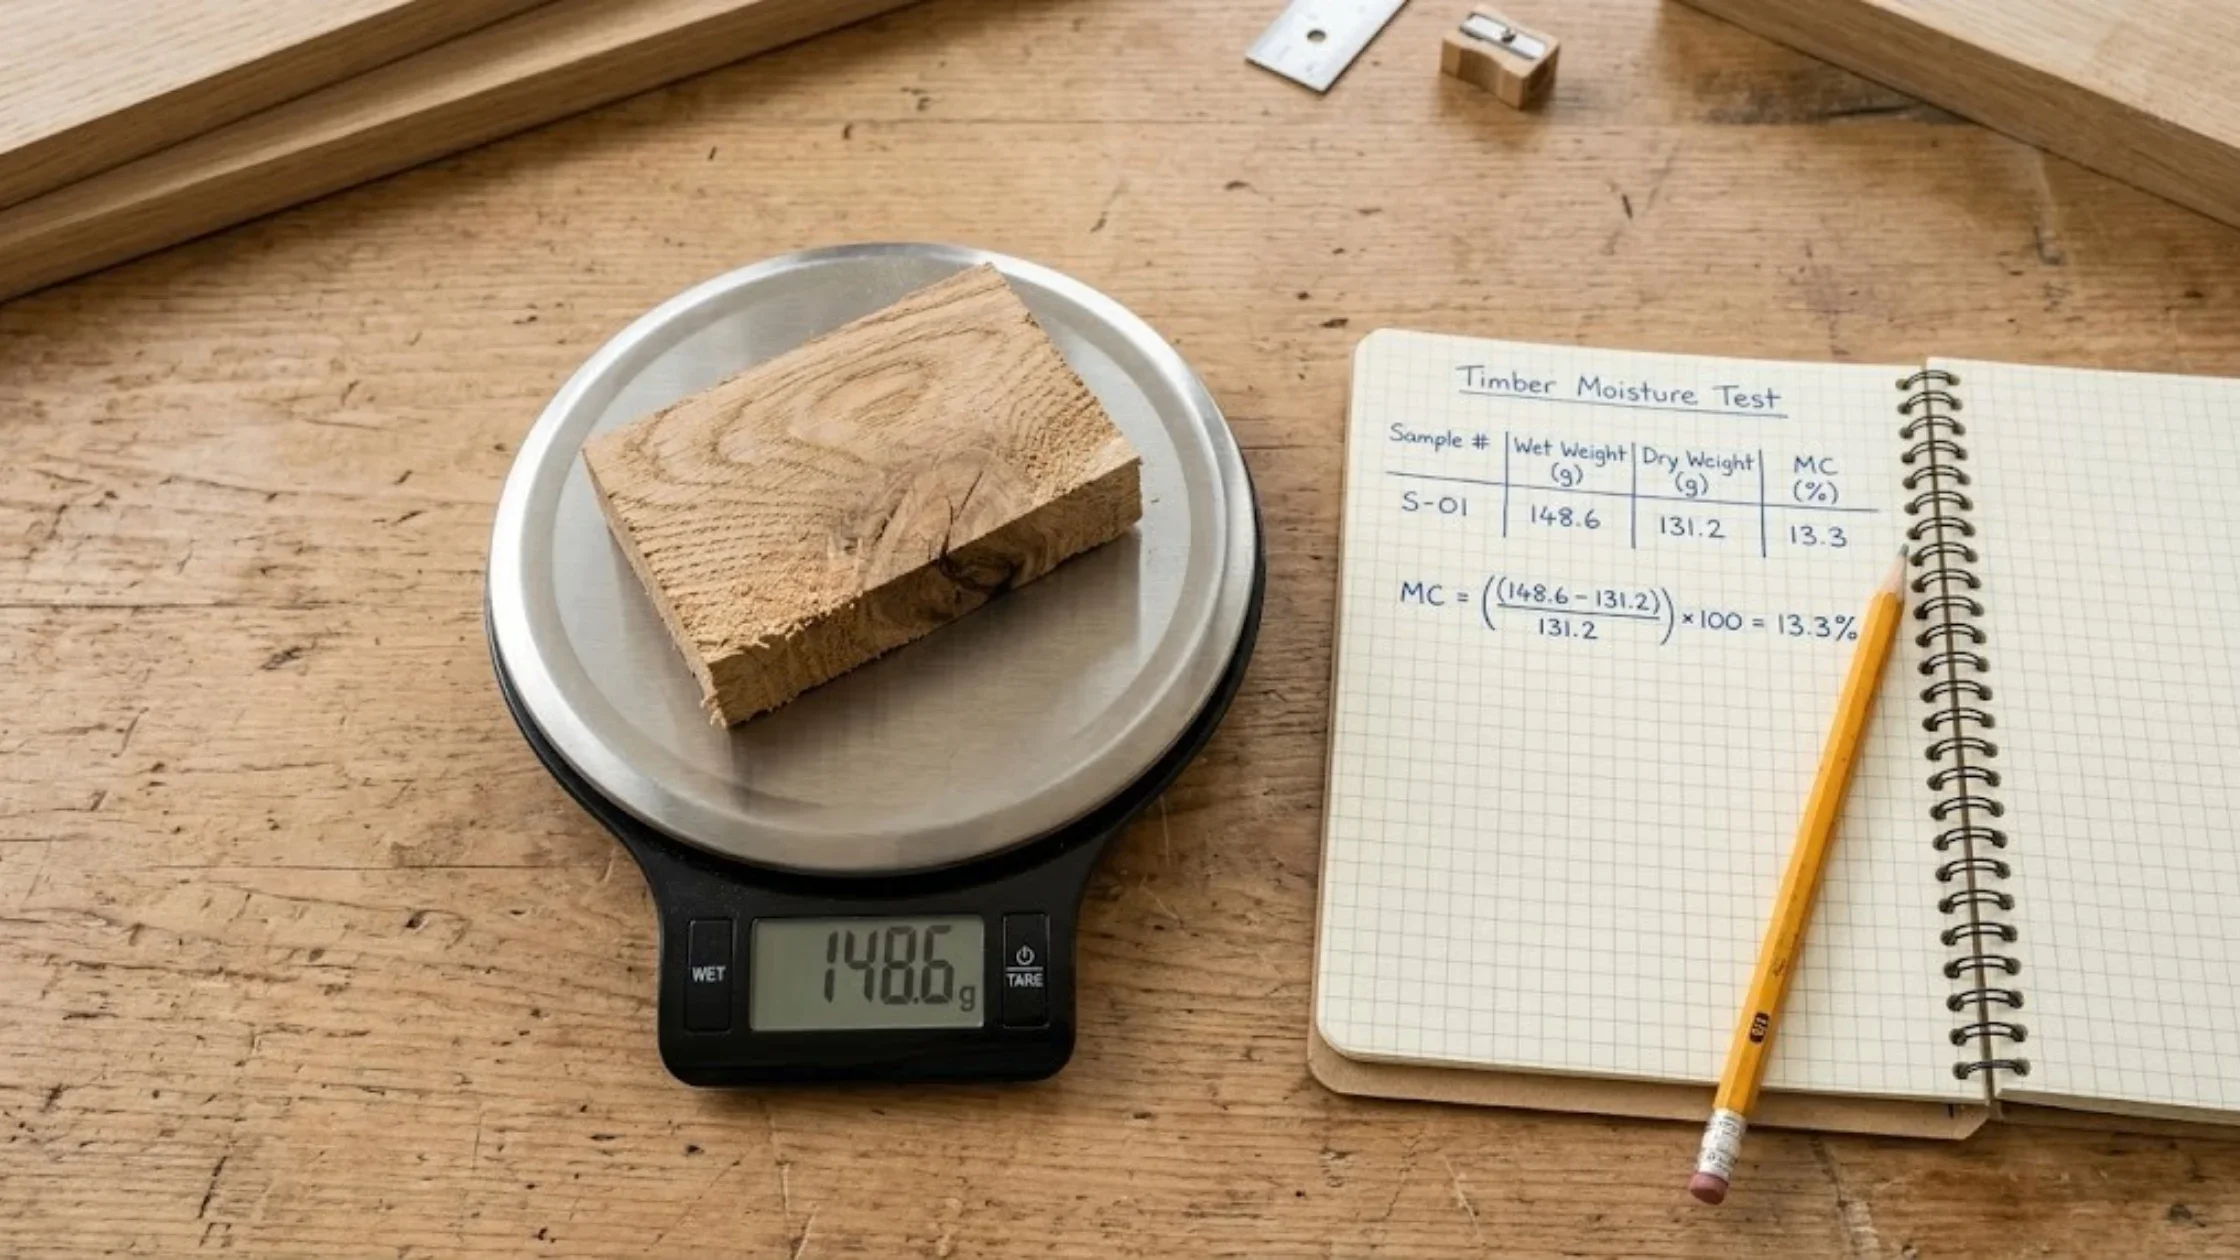
If you don't have a moisture meter handy, this old-fashioned method still works and only needs kitchen scales and an oven. Cut a small sample block from your timber, weigh it precisely, then dry it in a low oven (around 100–105°C) until the weight stops changing between weighings, usually two to four hours. The difference between the wet weight and the fully dried weight, divided by the dry weight, gives you the exact moisture percentage. It's slower than a meter, but it's genuinely accurate and costs nothing beyond your time.
4. Simple At-Home Checks (Backup, Not a Substitute)
While nothing replaces an actual reading, a few quick physical checks can flag obvious problems. Cold, clammy timber that feels heavier than a similar dry board is a warning sign. Dark or damp-looking patches, a musty smell, or fine white mould are all signs moisture is still trapped inside. These checks won't give you a number, but they're a useful first pass before you reach for a proper tool.
What's the Right Moisture Content for Your NZ Project?
Different projects call for different target ranges, largely because the timber will sit at different humidity levels depending on where it ends up.

If you're planning a build, our guide on timber grades for DIY projects pairs well with this one, as grade and moisture content together determine how your timber will perform once it's in place. For anyone building a shed or outdoor structure, it's also worth reading our notes on timber movement, since even correctly dried timber will move slightly with the seasons.
How to Use a Moisture Meter Correctly
Getting an accurate reading isn't complicated, but a few small habits make a big difference. Firstly, always test on a flat, clean section of the timber, away from knots, sapwood edges or old fastener holes, since these areas give distorted readings. Secondly, take at least three readings across each board, including one near each end where moisture escapes fastest, and average them out rather than trusting a single number. Thirdly, check the timber species setting on your meter if it has one, because different woods conduct electricity differently, and a meter calibrated for pine will misread denser hardwoods like macrocarpa or cedar. Finally, retest after the timber has acclimatised in your workshop or building site for a week or two, since moisture content shifts with the local environment, and your final pre-build check should reflect the conditions your timber will actually live in.
Common Mistakes Kiwi DIYers Make
The most frequent error is testing only the surface of a thick slab and assuming the core matches. Timber dries from the outside in, so a board can read dry on the face while the centre is still well above target. Another common mistake is buying timber and building with it the same week, without giving it time to acclimatise to the humidity of your home or shed. Nelson and Tasman's coastal climate adds moisture back into timber faster than many people expect, particularly over winter. Lastly, many first-time DIYers skip testing altogether when timber comes from a supplier, assuming "kiln-dried" means it's ready to use immediately, when a quick meter check only takes a minute and confirms it for certain.
Key Benefits of Checking Moisture Content Before You Build
Prevents warping, cupping and cracking after installation
Stops joints in furniture from loosening over time
Reduces the risk of mould and fungal decay
Saves money by avoiding rework or replacement timber
Gives you confidence your project will last for years, not months
Ready to Build With Timber You Can Trust
Testing moisture content yourself is worthwhile, but starting with properly seasoned, quality timber makes the whole process far easier. Plankville's timber range is prepared with exactly this in mind, and our team can talk you through moisture readings, grades and the best stock for your specific project. Whether you're planning a garden shed, a set of shelves or a full furniture build, browse our wood products or see completed builds on Plankville in Action for inspiration. If you'd rather talk it through first, get in touch with our team — we're based right here in Richmond, Tasman, and happy to help you get it right the first time.
The Bottom Line for Your Next Project
Measuring timber moisture content isn't an extra chore tacked onto your project — it's the single check that protects everything else you're about to build. A cheap meter, five minutes per board, and a bit of patience while your timber acclimatises will save you from the warping, gaps and rework that catch so many DIYers out. Get this right, and every hour you spend building afterwards is time well spent.
FREQUENTLY ASKED QUESTIONS
-
Pin-type moisture meters are the best all-round choice for DIY use, offering accurate readings from $40–$150. Pinless meters suit finished furniture since they leave no marks. For structural or slab work, a pin meter with a species-adjustment setting gives the most reliable results across different timber types.
-
Take readings from at least three points on each board, including near both ends, and avoid knots or old fastener holes. Insert pins fully for pin-type meters, average your results, and retest after the timber has acclimatised to your build site for a week or two for the truest reading.
-
Hardware stores, timber merchants and specialist tool suppliers across NZ stock moisture meters, with prices from around $40 for basic pin models to $200+ for professional pinless units. Trade timber suppliers can often recommend a suitable meter alongside your timber order.
-
NZ building guidance recommends structural framing timber sit between 16–19% moisture content at installation. This range balances strength and workability while allowing for the timber to settle naturally as it reaches equilibrium with your home's internal environment over time.
-
Press the pins or pad firmly against a clean, flat section of timber, avoiding edges and knots. Take several readings per board, check the species setting if your meter has one, and record results before covering framing with cladding or linings, when access is easiest.
-
Most major hardware chains and specialist timber and tool retailers throughout Auckland stock moisture meters suited to DIY and trade use. Online NZ retailers also ship nationwide, so Aucklanders have both in-store and delivery options depending on how quickly the tool is needed.
-
DIY users generally rate pin-type meters highly for affordability and accuracy, particularly for furniture and framing checks. Pinless meters score well for convenience on finished surfaces. Most reviewers agree a mid-range meter, rather than the cheapest option, gives the most dependable long-term results.
-
Yes, several building inspection and timber consultancy firms in the Wellington region offer professional moisture testing, particularly for weathertightness assessments, pre-purchase inspections, and larger construction projects where precise, documented readings are required.
-
Yes, basic pin-type meters start from around $40–$60 through NZ online retailers and marketplaces, making them accessible for one-off DIY projects. Mid-range models with better accuracy and species settings typically sit between $80–$150.
-
Quality exterior sealants, oil-based finishes and UV-resistant stains all help slow moisture re-entry into outdoor timber. Proper ground clearance, drainage and airflow around structures like decks and sheds also play a major role in keeping moisture content stable long-term.
